January 31, 2010

Brunch Strata


Brunch is a really challenging meal to host because so many things you serve have to be done at the very last minute -- eggs, pancakes, french toast.

I was hosting a small brunch party today and went in search of something I could prepare in advance and leave to bake while I was entertaining. Enter the brunch strata.

Strata is like a breakfast casserole. It's wholesome and hearty, healthy and delicious. And you can prepare it in advance and watch it bake while you're enjoying a mimosa. What could be better?

Here's the recipe I used this morning and it was a hit!

Ingredients

  • 1 cup sliced mushrooms
  • 1 cup chopped zucchini
  • 1 cup diced onion
  • 1 cup chopped red pepper
  • 1 cup bacon/ham/sausage -- whatever you have on hand
  • 2 cloves garlic
  • 1/4 cup oil
  • 1 pkg cream cheese (softened)
  • 1 1/2 cups shredded cheddar cheese
  • 1/4 cup cream
  • 2 cups day-old cubed bread
  • 6 eggs
Directions

  • Cube bread about the size of large croutons and leave out overnight
  • Prepare veggies


  • Cook the meat, drain and set aside

  • Sautee veggies in oil and garlic, drain and set aside


  • In a mixer, combine cream cheese with cream until smooth
  • Add eggs and mix
  • Add bread crumbs, veggies, meat and cheddar cheese and mix
  • Pour into greased 11 x 7 pan

  • Bake in oven at 350 degrees for about an hour
  • Let cool for about 10 minutes
  • Serve!
(this is it baked, but I couldn't take a picture before the vultures got at it!)


January 26, 2010

Creamy Shrimp Fettucine


Now that you know how to make pasta, here's a delicious and easy topping for it: Creamy Shrimp Fettucine.

Ingredients:
(serves 4)

  • about 6 shrimps per person
  • 3 tsp butter
  • 3 tsp olive oil
  • 4 garlic cloves, very finely chopped (I have discovered pre-chopped garlic = way easier)
  • one red pepper sliced
  • 2 tbsp tomato paste
  • 1/2 cup white wine
  • 1/2 cup cream
Directions:

  • Heat the butter and oil over a medium-low heat. Add garlic and cook for a few minutes. Then add red pepper.


  • Stir in tomato paste and wine, simmering for about 10 minutes
  • Bring a large pot of water to boil and add pasta. Before draining, add about a 1/4 cup of pasta water to the pasta mixture
  • Add shrimp to the sauce and raise the heat to medium-high, cooking until shrimp turn pink
  • Reduce heat and stir in the cream, cooking for one minute until thickened. Add salt and pepper to taste


  • Add pasta to sauce and mix together
  • Serve to hungry crowd!


Home-Made Pasta


One of my favourite wedding gifts was a pasta maker attachment to go onto my Kitchenaid stand mixer.

While it takes some time, making pasta is actually a really enjoyable activity. It's sort of like playing with playdoh, but it tastes a whole lot better!

I have read many different rules of thumb for making pasta. Some say one egg per 3/4 cup of flour, while others say two eggs per cup of flour. What's a new cook to do? So this time, I added two eggs, and then slowly added the flour until I felt like it had the right consistency and I think I've really discovered that elusive "you'll know by the feel" that other chefs (I say that like I'm a chef, too) talk about!

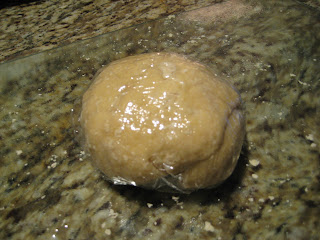
After making my dough, I let it rest for 30 minutes.


Then I cut the ball into quarters and took one piece to run through the pasta maker, leaving the other pieces covered so they wouldn't dry out.


I ran it through the machine a lot, each time, folding it into a tri-envelope fold and then running the "open" end through the machine.

Once I had all the "sheets" of pasta, I covered them in flour, covered them with a dish towel to rest again for another 20 minutes.


Now, the fun part. Take each sheet and run it through the pasta cutter.


Let rest again for another 20 minutes or so and then cook in salted boiling water for 3-5 minutes.

Don't have a pasta maker? Pioneer Woman tells you how to make pasta without one.

And of course, my sous-chef was instrumental.


Don't have a sous-chef? Not to worry, he wasn't really that helpful.


Success!!!

Finally... a perfect loaf!


January 18, 2010

Chicken Wellington


In my family, you always got to choose your own birthday dinner. Every year, I chose chicken wellington -- a delicious parcel of dough filled with chicken and cream cheese. Mmm!

So I made them for T and I for dinner on Saturday night with a delicious salad. They're pretty easy to make and we had two left over for a super easy dinner on Sunday night.

Ingredients

  • 3 chicken breasts
  • slightly more than 1/2 a brick of cream cheese (at room temperature)
  • 1 package of Pillsbury crescent rolls
  • 3 green onions
  • 2 teaspoons of butter
  • 2 tablespoons of milk
  • salt and pepper to taste
Directions

1. Boil the three chicken breasts in a pot of water for about 20 minutes or until cooked through


2. Cube the chicken into bite sized pieces. Note: If you can leave the chicken to cool in the fridge for about an hour, it cuts cleanly and won't shred

3. Put the cream cheese in a medium sized bowl and make sure it's pretty soft.


4. Add some butter and some milk to the mixture, but not too much, you don't want it to be too runny -- mine looks like cottage cheese


5. Cut up your green onion into small pieces and add to the mixture. Then add the cubed chicken and mix (this should look like chicken salad)


6. Now, take your crescent rolls out of the fridge (leave them in as long as possible -- they're easier to work with), and open up the roll. You should have 8 crescent rolls, but you want to make four wellies, so keep them in pairs like a square


7. Use a rolling pin to make them a big as you can and make sure the seam in the middle is pinched together

8. Put 1/4 of the chicken mixture in the middle of the roll


9. Now, don't be scared, but ultimately, you need to close this like a present. My mom's are perfect always, so I know it can be done! I take the corners and pull them in, and then you might need to pierce some seams together. This is the bottom, so it can look a little sloppy


10. Bake at 350 degrees for 20 - 25 minutes, or until dough is done and slightly brown on top


Even Coop wanted some :)


If you can believe it...

This no-knead multigrain bread:


Tasted AMAZING!!! It was crusty on the top and perfectly moist and delicious inside.

Now, I just need to work on my presentation.

Does anyone know how to avoid this "boiling over" problem I had?

January 10, 2010

Leek and Potato Soup


This is one of our standbys for cold winter nights. It's my dad's recipe and it's easy to make and keeps well in the fridge for a few dinners during the week. Serve with a delicious french stick (at some point, I will learn how to make one).

Ingredients

  • Two bunches of leeks
  • One medium sized onion
  • Three medium-sized potatoes 
  • 1 1/2 boxes of chicken stock
  • 1/2 cup of cream
  • 1/2 cup of white wine (any kind you have on hand)
  • 2 T butter
  • salt and pepper to taste
Directions

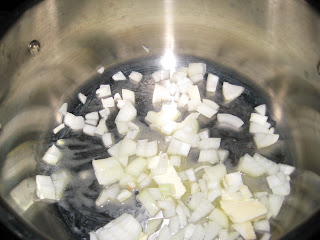
1. Dice onion and sautee on low with butter


2. Cut and clean and chop the leeks. With leeks, you can only use the white and the light green parts. Cut off the end with "hair' and then about 70% of the top. Then, slice lengthwise down the middle and run under water, opening up each layer to ensure there's no sand between them. Then, roughly cut them width wise.


3. Sautee leeks with onion for about 20 minutes

4. Peel and dice potatoes.


5. Add chicken stock and diced potatoes to pot. Bring to a boil and then lower to a simmer until potatoes are cooked.


6. Take off heat and let cool slightly before blending. I find the easiest way is to just stick in my immersion blender and blend around for a couple of minutes.

7. Place back on heat and add cream, wine and salt and pepper. Bring up heat and let flavours blend. 


This is one of those dishes that is actually better the next day because the flavours really marry together well. Mmmm!

No Knead Multigrain Bread

ACE Bakery has not called me yet. It's getting closer, but my bread still isn't bakery-quality yet. I got frustrated with the whole wheat bread I've been making, so I tried out a new recipe -- No Knead Multigrain Bread, from a book called Kneadlessly Simple.

The premise is that this bread has a really long, cold rise time, so it's not as time sensitive as regular bread and less finicky. Plus you don't need any equipment except for a bowl and a spoon.  While mine was not perfect, I am pretty sure I know where I went wrong, so I'm making progress!! I am going to try this one again and hope to perfect it.

Ingredients

  • 3 cups white bread flour
  • 1/4 cup whole wheat flour
  • 1/4 cup brown rice flour (I found this at Bulk Barn, but you can also get this at health food stores)
  • 2 T of quick rolled oats (not instant)
  • 2 1/2 T sugar
  • 1 1/2 tsp salt
  • 1 1/2 T EACH of sesame seeds, flax seeds and poppy seeds 
  • 2 T cornmeal
  • 1 tsp Fleischmann's Rapid Rise Yeast
Directions

1. Mix together all the dry ingredients EXCEPT the corn meal


2. Stir some ice cubes into 2 cups of water and leave for at least 30 seconds before measuring

3. Add the water a little bit at a time stirring vigorously. (I found this very difficult to do and either don't have enough muscle in my arms, or vigorously was a little too enthusiastic)


5. First rise: Once combined and mixed, rub some oil into the top of the bread and cover with plastic wrap. You can refrigerate for three to 10 hours. Then, let rise in a cool place for 12 to 18 hours (at about 70 degrees)


6. Next, brush a 9 x 5 pan with oil and then put in 1 tsp of cornmeal on bottom and shake around to cover sides, too. Scrape down the sides of the bread into the centre of the boal with an oiled spatula and then roll it into the loaf pan. Pour some oil on top and gently press bread down into sides of loaf pan. Generously brush with water and sprinkle the remaining cornmeal on top. Finally, with a serrated, oiled knife, cut a 1/2 inch deep slit down the centre lengthwise. Cover with plastic wrap.


7. Second rise: For a 2-4 hour regular riselet stand at warm (74-75 degree) room temp.
For a 45 min- 2 hour accelerated rise (I used this one, and but left it for two hours until it rose almost fully) let stand in a turned off microwave along with 1 C of boiling water. When the dough nears the plastic, remove it and continue the rise until the dough extends 1/2 inch above the rim of the pan.

8. 15 minutes before baking time, put a rack on the very lowest rack of your oven and place a broiler pan (or other shallow baking pan) on it. Place your other rack one notch above that and preheat to 450 degrees.

To bake, reduce heat to 425. Add one cup of water to the pan on the bottom rack; don't refill if it boils dry. Bake bread on the other 
rack for 35-45 minutes or until the loaf is nicely browned. Cover the top with foil and continue baking for 20-25 minutes until a skewer inserted in the thickest part comes out with just slightly moist particles clinging to the bottom portion (or the internal temp registers 204-207 degrees). Remove the loaf to to a cooling rack. When it's cool enough to handle, you can take it out of the pan.


The inside of the bread was absolutely delicious. Like bakery bread. It "tore" and had delicious air pockets and was overall wonderful. Where I went wrong though, is that when I had the oven at 450 degrees, I turned it down to 425 right when I put the bread in the oven, so it burned and the crust was a little too crusty.

I'll definitely make this one again, though. I think it has great possibilities and what's also amazing is that you can mix the dry ingredients in advance and then all you need to do when you're ready, is add water.

January 8, 2010

Bread, Take Six


I'm baking bread again. I should have read the recipe all the way through first, because I now need to stay up until 2 a.m. to meet the first rise time. Awesome.

January 2, 2010

In my backpack...

T and I went to go see the movie Up In The Air with George Clooney. In it, George's character asks, what do you want in your backpack? What do you want to carry with you through life?

So I asked T what he would put in his backpack if he had to leave today, and he quickly said, "You and Coop." (the dog)

Without question, this is what I would pack:


(yes, they sleep a lot, but this is when they're cutest)

And I would be sure to sneak this in, too:


(Best purchase ever)

Best Banana Bread Ever

My freezer is full of bananas. Dozens of black, overripe, frozen bananas. I needed to make some room so I brought out seven small-medium bananas and made the best ever banana bread.

Ingredients

  • 1 cup butter
  • 2 cups sugar
  • 4 eggs
  • 3 cups flour
  • 2 tsp baking soda
  • 2 tsp salt
  • 2 cups mashed bananas
  • 1 cup sour cream
  • 2 tsp vanilla
  • 1 cup chocolate chips (I didn't have them on hand this time, but they are delicious)
Directions

1. Cream butter and sugar until fluffy
2. Add eggs and beat


3. In a separate bowl, mix flour, baking soda and salt
4. Mix into butter, sugar and egg mixture


(the pouring shield really makes this easy)

5. In another separate bowl, mash bananas and mix with sour cream and vanilla
6. Add to other mixture and mix together


7. Pour into two loaf pans and bake at 350 degrees for an hour.


LinkWithin

Related Posts with Thumbnails
Web Analytics